
Getting started with MediaShout 7 is really easy!
The first time you open MediaShout 7, you will be prompted to either do a trial or activate your license. If you have a license code, go ahead and activate it now. If you haven’t purchased a license code yet and just want to try the program, choose Trial Mode.
After completing the Trial or Activation wizard, you will be presented with the Tip of the Day. Closing that window will show you the Welcome Screen. Here you can open any of the pre-loaded scripts we have created
for you such as the Introduction Script or the Sunday Service Template Script. To create your own script, read on.
Creating A Script
- Click “Create a New Script” or press CTRL+N. Now you are looking at the Control Screen with a Blank Script open.
Inserting A Blank Cue
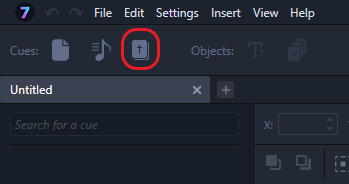
- Let’s start by clicking the Insert Blank Cue icon in the Ribbon.
- Let’s give our new Cue a name and then we will see it in the Script on the left. We can now add Objects to it (like Text Boxes, Images, and Videos).
- Let’s click the Insert Text Box icon in the Objects section of the Ribbon and a text box will appear on our Page in the Edit Area. You can now replace that text by selecting and typing in the text box. You can also resize the text box by dragging the corners or move it around your Edit Area.
- The Edit Ribbon right above the Edit Area will also give you contextual controls based on what object is selected in the Edit Area. Since we have a text box selected, we will see controls for Font, Size, Color, Alignment, and much more. Edit as you desire.
- Let’s now add a background to this Cue (note, the background will carry over to all of your pages within this cue). Go to the Layers Tab on the right and under the Layers Heading, click the Background button (underneath the Text Layer listed there).
- From here, you can choose a color for the lowest layer or place an Image or Video as the Background. Once you have what you want, just click the Save Changes button in the bottom right.
- Finally, let’s add an image object to our page. Click the Insert Media Files icon in the Objects section of the Ribbon and you can now choose an image or video file from anywhere on your computer. Find an image (.jpg or .png file for instance) on your computer and select it to insert it.
- You will notice that you have a different set of controls in the Edit Ribbon now because you are selecting an image. Move and resize the image as you prefer.
- You can also adjust whether the image object is above or below the text object by dragging it up and down in the Layers Tab on the right.
We have now completed creating our first Cue from scratch. Let’s move on to Lyrics.
Inserting Lyrics
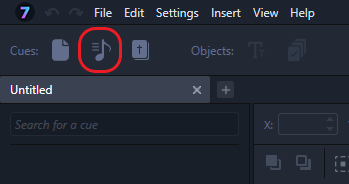
- Click the Insert Lyric icon in the Ribbon. This will open up to your Lyric Library.
- For now, let’s just select one of the Lyrics in the All Folder of My Library. You can see a preview of the lyric on the right.
- You can also change the mode to list view by clicking the icons in the upper right of that window.
- If you want to add additional stanzas, change the order, or repeat stanzas, you can configure all of that here.
- Let’s just leave it as-is for now and click Insert Lyric. The Lyric cue has been added to our Script and is ready for editing. We could insert more lyrics now, but let’s just close this window.
- In the script, you will see multiple pages for your Lyric, depending on the number of stanzas.
- Just like before, you can edit the Text as preferred, but one key difference is that the text boxes are all linked. If you want to change the font, size, location, etc. on all of the lyric text at the same time, simply make the change to one text box and then right-click and choose “Apply Formatting to All Pages” and this will change all of the Lyric Text to match. It’s an easy and fast way to adjust everything for this one Lyric.
- We can also add a background to this Lyric just like we did before by going to the Layers Tab and clicking the Background button. This will apply the selected Background to all pages of this Lyric.
Finally, let’s add some scripture to our Script.
- Click the Insert Bible icon in the Ribbon to get started.
- When the window opens, you can choose from any of the available Bible Translations in the top left. Then choose a Book and a Chapter. You also have the ability to create two Bible Translations on the screen at the same time using the Dual Bible function, but we will save that for later.
- Once you have the Chapter selected, the center window will populate with the verses of that Book and Chapter. You can click on any number of boxes next to the verses (even non-sequential verses) to select them. You will see the reference change in the top as your selection changes. You can also edit your selection by editing the reference at the top.
- Once you have your verses selected, you will see a preview of them on the right. Click the Insert Bible button to add this Cue to your Script. Like Lyrics, we can add more scripture, but for now, let’s close the window.
- You can now edit the Bible Cue just like you did a Lyric Cue, including font, size, location, background, etc. and right click to “apply formatting to all pages” if desired.
Playing Your Presentation
Once you are satisfied with your Cues, then let’s play or “Fire” your presentation!
- Usually, the best thing to do first is to switch the tab section on the right from Layers to Viewers. This way, you can see what you are playing out to the screen. Since we aren’t working with the Stage Display at this time, switch the bottom viewer to Main Display Next.
You may also notice a resolution setting under the viewers at this point. For our first script we have created, this isn’t an issue, but for future scripts, you will want to make sure you configure your resolutions correctly before you build your content.
- On the left side of your Control Screen, where your Script is, you have your three Cues you created. To the right of each Page under a Cue is a Play Button that will appear when you hover over the Page. Click that for Page 1 of your first Cue. Now you can press F9 to go forward through your presentation or F7 to go backward, or continue clicking with your mouse to fire pages at random. You will see it change in your Viewers as you go through your presentation. You may also use the spacebar to advance, but be sure your cursor is not sitting on one of the controls to prevent the space from toggling that function.
- Another option is to enter into Presenter View, which will flip the space in the middle of the control screen from the Editor to an area with thumbnails of all your Cues and Pages—perfect for running your services.
- To access Presenter View, use the toggle switch toward the top right of your screen, or press Ctrl + Alt + V. You can then use the zoom slider to make the thumbnails larger or smaller, or change to a list view to see more of your content at once.
- In Presenter View, you can double click any slide to immediately fire it to the screen, and just like in Edit view, use F7 and F9 to go backwards and forwards, or the spacebar to advance.
That’s it! In just a few minutes, you built a Script with different Cues and played it. Of course, there is a lot more to MediaShout 7 than just this and the more you do, the faster you will get. If you want to learn more, we encourage you to keep reading this User Guide (we will go into great detail), open and play through the included Scripts in the program, and check out our training videos. Of course, if you get stuck on anything, just let us know and we would be happy to help.